Bees

Bees
Bee on my privet

Thursday, August 1, 2013

Zombees

No, this is not a horror film on late night Syfi channel. Though I bet they will make one eventually.
  Zombees are bees that have been parasitized by the Zombie Fly, Apocephalus borealis. The fly injects it's eggs into the abdomen of the honey bee where they develop over the next 5-14 days then the maggots crawl out of the hapless bee's body. Fun, huh?
 www.zombeewatch.org  is a great place for information on these gruesomely fascinating creatures. If you have bees set up a trap and do some samples. It's fun and educational and creepy.

-Robert

These are not pictures of Zombees. These are pictures I just needed a link to lol.
The bee with the amber liquid appears to have harvested some propolis and then got told to go fan the front door.
The second picture is arguably one of the coolest I have taken as you can see the pattern the wins follow by looking at the shadow of the bee.


Wednesday, July 24, 2013

Swarms in July

A few days ago I received a call from a friend. His lawn care guy said there was a tree down in the yard at one of his houses. He goes to check it out and sure enough, half of a huge willow is laying in the back yard on the ground. He proceeds to chop it up with his chain saw until he gets close to the fence. As he get close to the fence he notices a bunch of bees flying around and calls it quits. This is where I come in.
Glen calls me and tells me he thinks there is a honey bee hive in the downed tree in his yard. I gather my bee things and a chainsaw and head over to take a look. After a brief inspection of the premises, my wife finds the colony. We pack up and tell Glen that they are indeed honey bees and that I will remove them the next day.
 Early the next morning, I clear vines and small shrubs from the area where the bees are and start making the log shorter. I get to the colony and screen the end. I wait till after dark and toss the whole log in the truck.
 When I get home I lay the log on the hive support where I am going to make their home and cover the entrance with leaves and such so they will reorient when they head out the next morning. I was not sure if I moved them a sufficient distance to ensure they would not head back to where the log used to be. Better safe than beeless.
 About mid-day I go and check on them and notice a large glob of hive beetle larvae in the end of the log. I figure now is as good time as any and proceed to cracking the log open. Wow. I cannot even begin to explain this poor devastated hive. How they managed to keep going is beyond me. Apparently, when the branch fell, all the comb compacted into a heap on what is now the floor of the hive. I am guessing the queen died in there somewhere because I never found her and there were no eggs, just honey. There was also very little usable comb. The small hive beetle infestation was so overwhelming that I just burned the log after I coaxed the bees into a langtroth. No useable honey or anything.
 To add insult to injury, after I got the bees into the langstroth hive, the bees that live in the pole on the other side of the shed began robbing them of the syrup I just fed them. To combat this, I blocked their entrance and moved the hive about 50 feet and them placed an empty 5 frame nucleus hive in it's place for any bees that were out to get into.
 I left for several hours........
 When I came back pandemonium was well under way. The sequestered bees decided they did not like being kept inside and removed the plug on the hive entrance. They then flew to where their hive used to be and for whatever reason, two colonies of bees were beating each other up over an empty box. Bees are apparently not as smart as I gave them credit for.
 I took the 5 frame apart and shook the bees out. It was getting pretty close to dark so everyone started heading home. I then moved the hive back to it's original location so the bees could get back in. I then made a screen tunnel about 6 inches long that leads up from the entrance hole to help prevent further robbing. I figured everything would return to normal at this point. I was wrong.
 At the crack of dawn (for me, around 8:30) I headed out back to check out the continuing craziness. I was not disappointed. There were bees everywhere! Oddly there were thousands on the empty five frame nuc hive. I had the front blocked off so they were just covering it. I cracked the screen a little and they started pouring in. At this point I am clueless. What the heck is going on? There are still bees all over the place in the air.
 I start walking around and notice there is a big wad of bees on the ground about 15 feet from the hives. Looks suspiciously like a swarm. So I poke at it with a stick. Sure enough there is a queen in that ball of bees. I grab another empty nuc and lay it next to the swarm and herd the queen in the
hive. This was not as easy as it sounds. I then ran and made a queen cage. Upon returning I could not find the queen till she comes waltzing our of the nuc like she owns it. I try to get her in the cage and she flies off. Grrrrrr. Why do I keep bees? Why will they not bend to my will?
 I go check the other nuc that I now figure is a primary swarm and there on top of it, is the queen I was trying to catch. After chasing her around for a bit I finally get her into the cage. I put her in the nuc where I want her and set it up on a ladder where the bees can find her easier.
 After all that is settled, I open the hive that was robbed last night. there are dead bees all over the place. I smash a few obligatory small hive beetles and begin to sweep up the bees on the baggy feeder. Apparently a few of them were not dead and I get stung three times on two fingers. Good thing I am left handed. There appear to be enough bees left to make a go at it so I add a frame of brood from the other bee yard and close it up. I will probably add the queen I caught today to this colony as the swarm is small and they need a queen anyhow.

The ball of bees I found on the ground.


The elusive queen. Trust me, she is in there.


Nuc waiting for bees to fly in.
 
 See the bees fanning on the porch? They are fanning queen pheremone to bring in everyone.
 
The logs bees' new home. 
 
 The log. Notice the smashed comb.
 
 The entire log was just filled with larvae and beetles. I ended up burning it.
 
That's all till next time where hopefully I will finish my Zombee blog.
-Robert

Sunday, June 30, 2013

Bees in a Pole - the sequel

  Let me tell you a story. A story of desperation, hard work and perseverance.

  I begins in a wooded lot on the other side of town (not your town, mine). If you read my last post then you have a pretty good idea of what is going on here. I sometimes do silly things like for instance post things in Craigslist like "Will remove bees, swarms and hives for free.". While this generally does not lead to any real difficulties, there is always that one time.
 This, is that one time.
 I post the afore mentioned post on Craigslist. A few days later I get a call. A guy wants me to remove a hive of bees. Now as a beekeeper, a hive is a box where the bees live. He tells me it is  a thriving colony. Great, I say to myself, some nice easy free bees and they come in a hive! After speaking with him a few minutes, I realize this is not going to be as easy as it seems. So I head to the site (You know, the wooded lot mentioned earlier) and size it up.
 I arrive and check it out. Sure enough there is an old steel gate post full of bees. I think to myself, this should not be to hard and tell the guy I will get them out as soon as I can.
 Several scenarios entered my mind on how to successfully remove this colony. None of them ended up being the final conclusion to this epic rehoming saga.
  Here is how it went down.
  A few weeks ago I show up with plans to take the bees home. The bees wanted none of this and refused to go in the pipe so I could close it off. We went home empty handed.
 The night before last I head out there with some proper bee equipment (smoker and such) and smoke them. They grudgingly go into the pole and I screen it up.
  Now imagine this if you will. I have my truck, an inverter (a doohickey that converts 12 volt car electricity to 115volt household electricity), and finally a recently purchased 7" angle grinder with metal cutoff wheels. Also the angle grinder was bought at Harbor Freight. Those of you who have used Harbor Freight tools probably know what is going to happen here shortly.
  I did test this setup at the house prior to heading to the site. It errrr worked-ish. So at the "hive" I hook up said equipment and head over tot he post and get to cutting. Hmmm seems that when I get into it a bit it draws too much power for the inverter to handle. After turning the inverter off and on like 25 times, we give it up open up the hive and head home.
 Last night we return again we screen the entrances. But this time I have a 5kw generator. Hehehe Should be no sweat, right? Wrong. After getting about 4 inches around what is a 30" circumference post the angle grinder gives up the ghost. Ahh Harbor Freight power tools. So I leave the bees screened in and head home.
 This morning I arrive with the sun at Harbor Freight and trade my non functioning angle grinder in for a fresh new one. Again, we head over to the bees. Again I get to cutting. Poor bees. This time, however, everything goes according to plan and I manage to cut all the way around the post. At this point I realize the wall thickness on this thing is 1/2". No wonder it took so long to cut it. I would guess it took at least 45 minutes to cut all the way around the post. 45 long chigger and spark filled minutes. I also took breaks to allow the pole to cool so the bees would not overheat.
 While I am cutting it, I slide shims in the crack to keep the post level while I am cutting and to prevent the blade from pinching. After I get it cut off, I figure I will pick it up a little and have my son slide a piece of screen under it to keep the bees in. Lets just say that the pole probably outweighed me and it did not budge.
 Time to bring out the heavy stuff. I have a roll around A frame that has a 6' I-beam at the top that I can roll a chain hoist on. We drag it out of the truck and assemble it like a giant Erector Set. Now again let me set the stage here. I am on a "paved" road and the post is about 10 feet into the woods. My crane has 6" solid tires. It did not exactly roll into place but we got it. I wrap the chain fall chain around the post and clip it to itself. I begin to hoist it up. Here is where, in hindsight, I could have saved myself a load of issues. Instead of leaving it just clipped to itself, I should have tied I rope to the other side of the chain to balance the load. I didn't and pandemonium ensued. I started up with the hoist and as the last bit of uncut metal separated, the entire post quickly and violently came off the base and skewed at a 30 degree angle. There is now a nine inch hole out of which thousands of very excited bees rapidly exited. We didn't stick around to watch.
 After the bees kind of calmed down, I went back in and attached a screen to the bottom of the post.
 Now, I have to say, these bees are taking all this very well. I have not been stung or really harassed this whole time except once at the very start of this. I am working in shorts and a t-shirt with no veil.
 Getting the gantry in the woods was hard, getting it back out with several hundred pounds of steel and bees was a miracle. Especially with a whole load of bees buzzing all over the place. I would like to take time out to thank my wife for helping get this out of the woods and on to what passes for a road in that place.
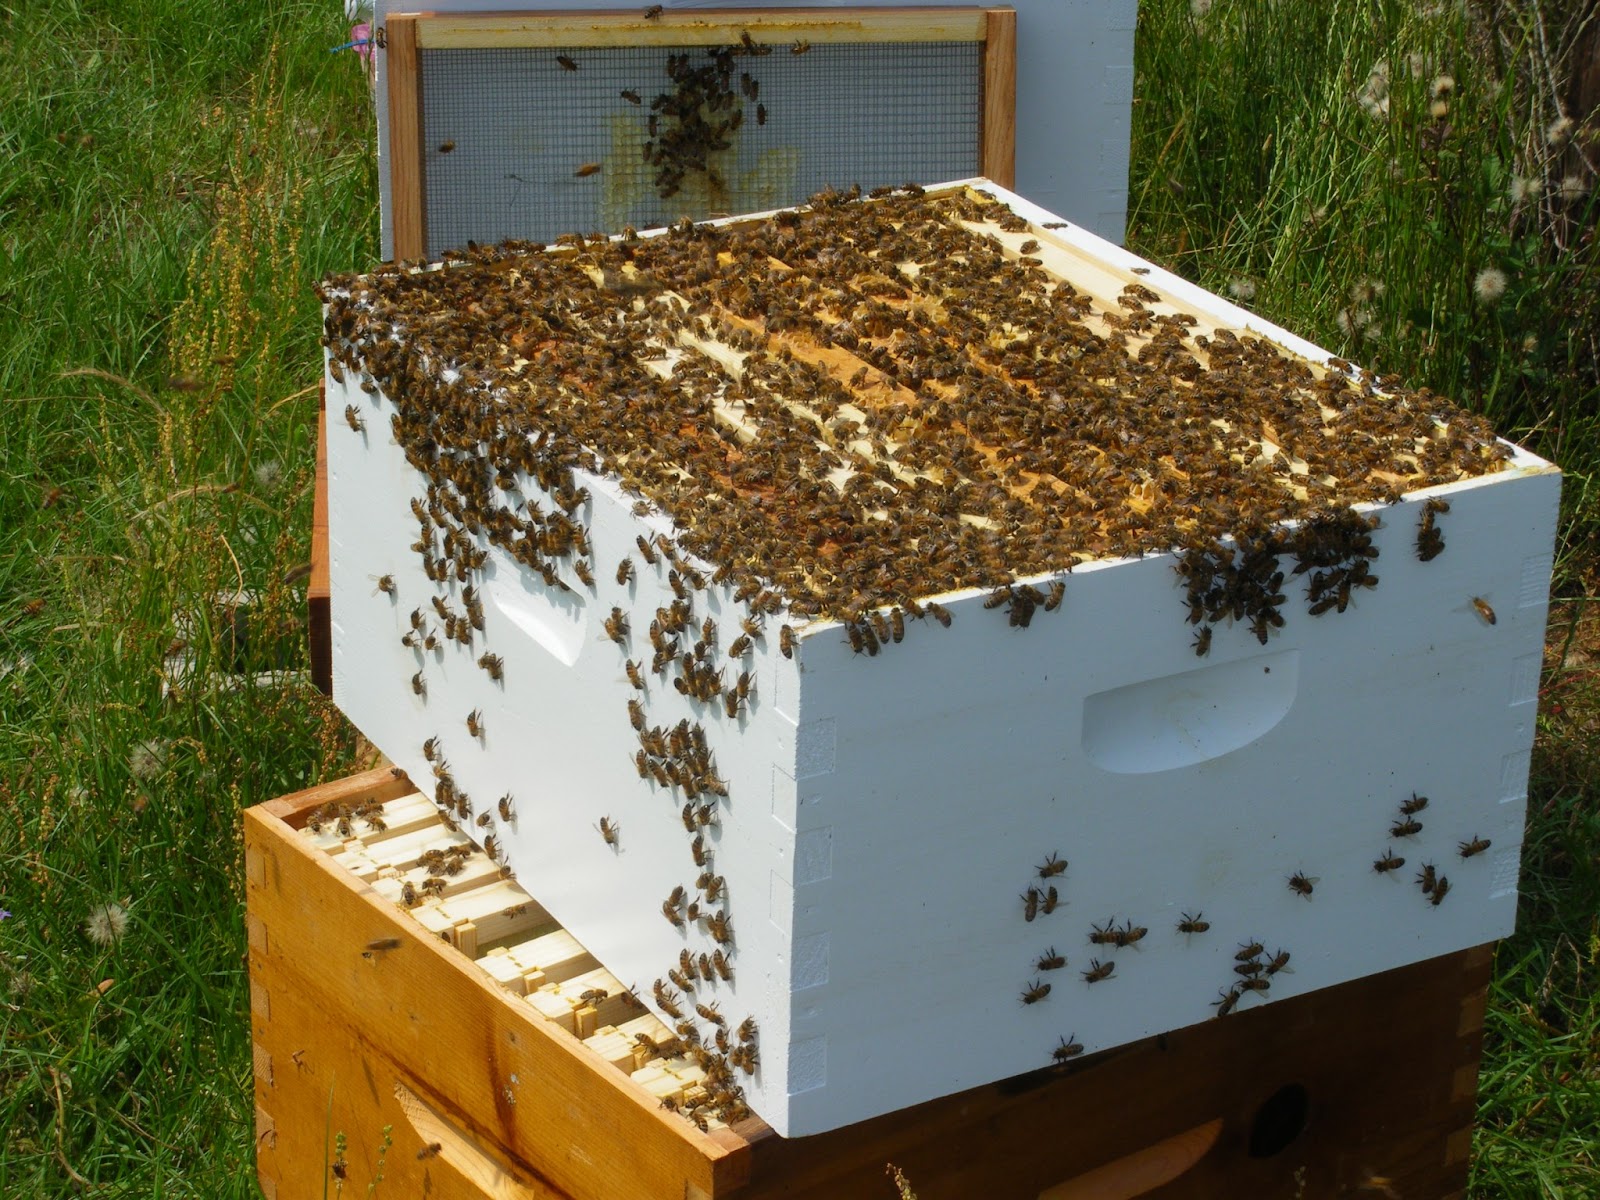
 It gets easier now. We hoist it into the truck and tie it down and drive it home. After we get it home I hoist it back out and on to the ground. Unfortunately some comb was damaged and honey leaked out into the truck bed. I kind of muscle it into its temporary place (till I figure out how to get them to move into a lighter and more accessible hive) and open all the screens. They are currently repairing the damage I caused and out collecting nectar and pollen. I am glad they are finally here. I can't stop watching them. They are such a busy hive.
Here they are heavily bearding as the sun hits the post.

A close up of the beard.

A temporary resting place. I should probably level it out.

Bees!

Here they are still strapped down in the truck.
 
A really big gate post.

The A-frame. The chain fall is in the bucket.
 
 
Look at how thick this steel is!!
The obligatory SHBs lurking in the bottom.
 
Well, this is where it's at till I figure out what to do with them next.
-Robert

Saturday, June 15, 2013

Pole Bees

 I got a call a couple of weeks ago about some bees in a fence post.  Actually I was told I could come get a hive of bees. I was thinking "Great! A hive of bees free for the taking". After talking to the guy I begin to realize that it is not going to be so easy after all.
 Apparently they are beginning construction on this land soon for a youth athletics park. Just inside the fence is an old gate. A gate the likes of which they do not make anymore. Why don't they make them anymore? Because they don't need to. The ones they made are all still in service. Even the one with the bees in it still works. I think it was for a rail road bed but I am not sure. None the less, this is the heartiest gate post I have ever witnessed.
 Behold

 
As you can plainly see, this is not your average gate post. It harkens to the great gate posts of yore.
 I went out one night a few weeks ago to size this thing up. There are tons of bees in it. It is a thriving colony. It is also surrounded by Chinese tallow and all kinds of wild trees and plants.
 My first thought was to cover all the holes then connect a box to the top hole with a short length of hose and slowly fill the post with water and then just take the bees. I am not sure if would even work honestly. I then thought of a bee vac. Again due to the nature of the hive, I did not think it was going to work. A trap out might work but I am pretty sure more bees would move in next spring(As a matter of fact, I might see if I can put traps out there next spring.) plus I would then need a frame of brood and such to get that colony going.
 So then I hatch a plan, a crazy plan, that involved some really big tools. I would cut it off and just take the whole thing home and work from there.
 Last night I traveled to the site. I figured I would just screen the openings and cut the gate off. At that point I would start cutting the pole off at the base and just leave a couple of places to hold up the pole and I would slide screen in there and then finish off the cut. Well when we got there I swear the post grew like 40% or more. I don't remember it being so big. I started clearing around the post waiting for dark to fall so the bees would go in the post and I could screen it over. Well either it is just too hot for the bees or that pole is really full. They would not leave the outside of the pole. They were bearding heavily and also looked like they were washboarding. I think they were laughing at me personally.
 As it got darker we started questioning whether or not we would even be able to get the post in the truck without mechanical help. After I finally got stung once ( I was wearing shorts and a t shirt, my usual bee keeping outfit) as I kept hitting the post with the shovel and I had a very bright headlamp on. I suppose I would have been aggravated as well. I decided that maybe I should have brought some bee keeping hardware.
 We head home beeless. After sitting pondering how to move this thing, I get a few ideas. I have a gurney that I can roll around with a chain fall on it. It has decent size wheels on it but not off road stuff. I figure I could set it up over the hive on some boards and when I have the hive lifted we could just make a plank roadway to the truck. That would require some intensive manual labor and a lot of tree chopping and a few logs needed to be clear.
 As I was pondering this, I notice a name on my Facebook list. Hmmmmmm This guy has a track hoe. I wonder if he feels like going on a bee crusade? I hit him up and sure enough for a nominal fee (he has to pay a driver to get the machine out there) he would gladly load it in my truck with the track hoe. Yay! Hydraulics!
 So aside from some really detailed scouting and a little clearing around the hive I did not accomplish much last night. Well my doctor might argue that all the exercise did me good. Personally Louisiana humidity is pretty rough and I would have rather had the kids do all the digging.
 As soon as I get a schedule together, I will make a new post hopefully detailing the successful transplant of this very active colony.
 Till that fateful day,
 
Robert

Wednesday, June 5, 2013

A little bit of honey

I purchased my bees a few months ago, just as everything around here was starting to flower. As I mentioned I purchased a couple of nuc packages. The great thing about them is that the hive is already established  and has brood and egg laying, the whole nine yards. It is just in a smaller hive. Fortunately, the time I installed my nucs into their normal hives coincided with normal growth for a colony. One of my colonies is doing great and I am about to add another deep super to it. The other is doing better and I will check on it this weekend.
 I have been watching the strong hive. It has been storing a lot of honey. Most of the honey is either mixed with brood or pollen or both. However, in the top box, the outside frames looked like all honey. When I went in there last weekend, I found they had capped one side of the frame. When they have caped the comb, it means the honey is ready. Oddly the other side of the comb was not even drawn out. Feeling a bit guilty, I took the frame of honey home.

Isn't it pretty?
 
 
Unfortunately, this is a plastic foundation. So I had to scrape the comb off and crush it up a bit and let it drain overnight. To do this I took a battering bowl I have that has a rack for whatever you are battering that sits above the batter. I laid a cheese cloth on the rack then put the crushed comb on top of it. I let it filter overnight and the squeezed the remaining honey out the next day.
 I managed to get about 15oz of honey from that half frame. I am pretty sure they have more now. I might add another box and pull some more in a few weeks if the weather holds up.
 So here it is...my first jar of honey. Thank you bees. : )
A nice jar of honey. Wish I could share.


Robert

Monday, May 27, 2013

The Benifits of Good Photography.

As I told you in my last post, I combined my colonies to ensure the weaker one will at least supplement the stronger colony. As I was checking the colonies my photographer, my 15 year old son, was taking pictures. As a new beekeeper, I am not as familiar with what brood looks like as I should be. However, after checking the pictures he took when I got home, I realized I made a mistake.
 I ran back out the next morning and separated the boxes. I then went back through the weak hive and found the queen. Whew! I was worried that they already comingled and that one of the queens were dead. Everything turned out ok. It looked like there was a decent amount of brood, not as much as I would like but not bad and the queen was laying eggs. I am hoping the bees that hatch out will expand the brood nest and increase the colony strength considerably before the end of the summer. Fortunately we have fairly long summers here so they should have plenty of time.
Here is one of the pics that changed my mind. All the open cells appear to have brood in them as well. I am pretty happy about that. I will keep an eye on this hive and keep my fingers crossed.

Till next week,
-Robert
 

Friday, May 24, 2013

Colony Failure

I went out today with the intention of putting the screened bottom boards on. However, things were not looking good.
Well, I tried over and over again to get my weak colony to flourish. I thought for sure what I did last week was going to work. It did not. I don't seem to have a queen. There are no eggs, no brood and no new bees. The brood I put in last week are all hatched out and they were building what looked like an emergency queen cup.
At this point, I just gave up. I combined the two hives. To combine them, I just removed the top cover from the healthy colony, stuck a sheet of news paper down and placed the two boxes of the weaker colony on top.
 I am fairly certain that they will thrive now. Hopefully the increase in population will get the colony to a nice healthy level.
 Unfortunately that brings my colony count to one. That means I have no fall back if something else goes wrong. I really need to catch a few swarms. I even set up a full ten frame hive as a trap out back. I should probably move some of them out of my yard and into the local woods.
 Not a lot of good pics for this. But here are some pics for the sake of something to look at.
 The healthy colony
 Bees a buzzing
 Can't tell if this is empty comb or maybe pollen?
 I little bit of brood but not enough in my opinion
 A very uneven pattern.
Crystal clear honey.

What appears to be an emergency queen cup.
 

 A bee eruption from the big colony
A dead bee on the bottom board.

Thursday, May 23, 2013

Some Bee Ventalation

As promised here are some pictures of the completed screened bottom boards. Bear in mind that all my stuff is made at home with the exception of frames. There is no way I am going to make those when I can get them so cheap.
 None the less, feast you eyes on this...
 Here is a nice top view of the screened bottom board.
Notice the slot under the screen for a mite sticky board.

Here you can see the whole slot for the mite sticky board.
I sure hope the bees like it.
 
-Robert

Tuesday, May 21, 2013

The Grapes of Endurance

While not about bees, this saga happened in my back yard and thus bears telling.
 Several yeas ago, four, I believe. I figured I needed some grapes. Not that I planned to get them or anything. They just looked cool at Sam's Club. A box of four but for whatever reason, only three varieties. Still, I imagined the vast amounts of raisins and wine that would soon be in my future. My own vineyard. What could be better?
 I purchased my grapes and proceeded to plant them about 20 feet from the back fence. Plenty of room for them to grow and me to mow and hopefully harvest my bounty. I left the tags on the grapes so I knew where the varieties were so I could anticipate my fruit. At this time I had no clue how to grow grapes. I just knew the were a vine and the source of, as I stated earlier, raisins and wine.
 Apparently I picked a really bad time to start a vineyard. That summer was the beginning of a bad dry spell for the area. I tried to keep everything watered but lost two vines that first year. The next year it was even worse. I lost two dogwoods, four blueberry bushes (I likely would have lost more but I only had four) a good bit of my privet hedges and what appeared to be my last two grapes. My wife also mowed over my son's blackberries in an unrelated incident.
 I figured it was all over and the whole vineyard thing was a write off. So I pretty much just planted nothing the following year. Surprisingly, as I wandered my non fruit bearing yard, I saw something coming up from one of the holes where the grapes was growing. At first I thought it was a weed but it ended up being one of the grape vines! well I tried to water it kind of half heartedly and it grew about three fee but died off about half way through the summer. I figured that was a wrap and I was done. It was stupidly hot and no rain in sight. No way it could survive.
 Unbelievably the next spring, it came up again! Well, I figured since it was trying so hard, maybe I should put a little effort into it. I began watering it daily. I placed fertilizer stakes around it. I also figured I needed some grape growing know how and hit the internet. I put up a trellis and attached it to the trellis. I was doing really well at this point. Shockingly well. I managed to get the vine trained down the bottom wire of the trellis and got the top started. I have it shaped like a "T" with the trunk in the middle and vines going left and right away from it. I also had another vine going up to a higher wire and it is also "T" shaped. The lower vine reached about 20 feet before winter set in and the top vine was about 8 feet. I was worried that because the vines were so thin, the ends were almost like little toothpicks, that they would freeze and die again. I just hoped for the best.
 Spring came and it budded all along the vine. Even to the very tips! This vine was determined to make something of itself. Well apparently to get grapes, you have to have a main vine that you grow one year and the following year the little branch vines that grow off that produce grapes. My little vine is currently so full of grapes that it is making my cheap PVC trellis posts bow.
 I have no idea what kind of grape it is, the label was lost the first time I thought it died. Hopefully the fruit will ripen and then I will know.
 I am just glad it did not give up as easily as me. It's really cool seeing all those bunches of grapes out there.
 The CD is to keep the birds off my grapes.

Saturday, May 18, 2013

Failing Hive

Well, I was trying not to make this an educational blog, but I am going to have to lay some groundwork for this one. I ran into a bad situation at the hives today. I was out to check on my weak hive to see how it was doing. I opened it up and much to my dismay, it appeared that I had (say this in a dramatic voice to yourself) "Laying Workers". Some of you in the bee business know what a laying worker and what the prospects for the colony are. Those of you who do not know what a laying worker is, well prepare for some education.
 When a queen dies or is failing, after two to maybe three weeks, the hive, in an attempt to boost population or just some kind of innate need to have a queen, produce what is called a laying worker. This is a worker bee that does not have the reproductive parts a queen does and therefore cannot mate. All of her offspring will be drones because they only require half the genetic information thus no need for fertilization. Drones are not a good thing to have in excess in a weak colony. They are consumers only, they do not gather or do colony chores. It then becomes a self inflating problem till the colony dies off. This is NOT what I want to happen to one of my only two colonies.
  There are limited ways to combat this. You pretty much have to remove the laying workers and requeen the hive. My issue is that there was a queen in the hive and she was happy as a bug in a well hive, I guess. I am wondering if the laying worker's pheromones may have over powered the queen's.
 So here is what I did. Who knows if this will work?
 First, I caught the queen and put her in a box, all alone.
 Second, I moved all the hive parts 50 yards away.
 Third I shook, or blew ALL the bees off ALL of the hive bodies, comb, foundation, bottoms and tops. I removed EVERY bee from the hive.
Fourth, I removed a nice comb of brood from my healthy colony and placed it in the weak hive.
Fifth, I rebuilt the weak hive and let everything settle down for a minute.
Finally, I released the queen back into the hive.

 I will go check on them next Friday.
  The reason for moving the hive away and getting all the bees off is to try to get rid of the laying worker(s). Supposedly they are too heavy to fly so they just die there in the grass.
  I placed some good brood in the weak colony to help bolster the population. The bees in there are approaching a month old since I last saw brood. Hopefully the infusion of new bees will get things going again.
  Now the fun part of this whole episode was retrieving the brood from the active colony. As usual, the colony built bridge comb from the bottom box frames to the top box frames. They then filled this comb with honey. To get at the brood, I had to get in the bottom box. I have failed to mention that until I went into this hive to get the brood, I was wearing a polo shirt and khaki pants. No gloves, no smoker, no veil. Well as soon as I broke that honey comb, the bees got angry. I swear they were Africanized! They were chasing me around, digging in my hair basically trying to sting me repeatedly. At this point, I left their hive in two pieces and went and got my smoker and veil. I finally managed to subdue them enough to get what I needed from them and to teach them a lesson, I scraped off the bridge comb....again.
  I will let you know next week how they are fairing. And hopefully I will have some screened bottom boards and some ventilation ekes made that I can share with you.
 Till next time.
-Robert
 

Wednesday, May 15, 2013

Swarm Traps

There are several commercially available swarm traps. There are also plans online. I just built a couple of five frame nucleus hives so I decided to bait them.
 From what I understand, trapping a swarm is the purest of luck. However, they seem to swarm in the same place year after year. At the bee club meeting last night, one of the big apiary owners says he has captured seven swarms at the same church this year. The church has had bees in the walls several times. I suppose that is a good lure. He also noted that he has two nucs set up. One at the north end of the church facing north and one on the south end facing south. Both nucs have attracted bees but he says he has had the bees in the north facing hive leave after a short time. He now has both hive entrances facing south. In each nuc he placed one frame of old comb and four empty frames. For a scent lure he is using a few drops of lemon grass oil placed on the top of the frames. Hopefully he will report on his success next meeting.
 I have had a couple of five frame nucs out hoping to trap a swarm. In my Nucs there were five frames of wax coated plastic foundation and some wax from my active colony with a little honey mixed in. So far, I have attracted ants.
 Today, I decided to mimic his setup as closely as possible. I visited the health food store and purchased lemon grass oil. I then pulled all the frames out of the hives except one each. I took a sheet of foundation and cut it in one inch strips. I then fitted the strips into the tops of the frames and painted the bare ends with heated bees wax I harvested from my active hive (remember the burr comb sticking to my screened inner cover?). I then moved the stand and hives to the south side of the shed so they will face south. I think I am going to put a roof over the stand. The tops are just painted quarter inch plywood and are beginning to delaminate in the rain.
 Now they are reassembled and ready to attract bees by the thousands. Hopefully the pictures will help illustrate what I have done.
Wax painted on the bottom of the starter strip
Starter strip in place. You can see the full foundation frame under this one.
My traps aka my nucs.
    Inside the hive. An old queen box in the back to help with pheromone lure.

Monday, May 13, 2013

Number 8

"Number 8", you say. "What the heck is that?". Well, it is the size of the hardware cloth you need to keep bees in their hive and mice and other things out. I had a very difficult time locating it. Number 8 hardware cloth has square holes in it that are approximately 1/8" in width and height. You would figure it would be at any local (ugh local...more on that in a minute) hardware store. You know, just laying there glistening in the sun with the chicken wire and such.
 I am here to tell you that is NOT the way it is. I started my search so I can start making screened bottom boards and inner covers for my hives. It gets very hot here in Northwest Louisiana so the bees need all the help they can get.
 Of course, the first place I looked was the big box stores. Then a feed store, and then a farm supply store or two and finally another hardware store. I finally resigned to just ordering it online. There are several places to get it online but oddly the shipping is more than the screen itself. I figured I would put it off for a while and see if maybe someone has a sale or something.
 Of course, every time I stopped at a place that did not have it, I said to myself "Self, You really need to check the hardware store down the street from the house, I bet he might have some.". I drive by this little store daily, likely 3 or 4 times daily. Not directly in front of it, mind you, but a block away from it. Every day....three or four times a day. Not stopping, just driving by.
 Well, today I had to drop off my scout leader uniform (both my boys are in Boy Scouts) to have some patches sewed on. Conveniently, the hardware store is next to the tailor.
 I walk in, expecting disappointment again. The hardware store owner, who is always there, asks if he can help me find anything. I say number 8 hardware cloth, you know 1/8" squares. He replies "I have a whole roll of it, how much do you need?".
 I was flabbergasted, flummoxed and excited all at the same time. However I did retain the mental faculties to ask for some. I ended up with a five foot by three foot section. Plenty to do what I need for now.
 Just goes to show you, start close before heading out into the wild oh, and support local stores.
 I will post up some pictures when I start making the ventilation parts.

Robert

Monday, May 6, 2013

Requeening My Hive.

As I was purchasing the new frames to fill the deep boxes I planned to add to my hives last weekend, I mentioned to the apiary owner that I might have lost a queen. He says, no problem, look behind you. There on a filing cabinet was a freshly arrived postal box chock full of queen boxes.
 A queen box is just as it states, a box with a queen in it. The box is enclosed on three sides and has screen on the fourth so workers can feed her, I presume. In one end of the box, is a plastic tube. In the tube is sugar candy. The theory is that by the time the workers eat enough candy to meet the queen, who is also eating candy, they should be on friendly terms and the new queen should have the run of the house.
 As you found out in my last post, I was pretty sure my hive was without a queen. Monday morning bright and early, I headed back to the local apiary to obtain a new queen. The interesting thing is, I have no idea if this queen has mated or not. I really need to call and ask. I just assumed it was a virgin queen. I am not sure if they sell laying queens. I will definitely look that one up.
 When I purchased the queen, the guy who sold it to me did not seem to know how to put her in properly. He said just pull out the tube of candy and let her go. I just nodded my head, took the queen and left.
 I arrived at the hives and was worried that the queen would not have anywhere to lay with all the frames being filled with honey so I added the second deep box to the hive but mixed it up a bit to try to keep everyone happy.
 I took the honey filled box and removed one frame from it and replaced that with an empty frame. I then took the honey frame and added it near the center of the new box. So I have 9 empty frames and one with honey. I place the queen box at the top of this frame and place that box on the bottom of the hive. I then put the honey filled box on top of the hive. I sure hope I didn't mess things up too much. I was just worried that the queen would not have laying room and I figured the bees would need all that honey. I will keep an eye on them and let you know how they are getting along.
 Thursday I will head out there and see if the queen is out. If it looks like this hive is going to fail, as  last resort I will combine it with my other hive.
 At the same time, I am putting my name out there for catching swarms. I have two extra nucs that need bees in them. Hopefully, I will get a call soon from someone with a swarm that needs removed.

Adding to the Hives

Sunday, I inspected my hives with the intention of adding another deep box to each if they needed it. I was trying to get to the bees with lots of daylight left so the foragers would all be too busy to attack me. No such luck. I got there about 30 minutes before sundown and it was getting cool fast.
 So I gear up...no wait, I just ran out there in a t-shirt and figured "This'll only take a second, I don't need any of that silly bee gear.". Lets just say beekeeping is an eye opener.
 The car, smoker, jacket, hive tool, wife, and friends are about 100 yards away. The latter two eyeing me with what appeared to be a mix or suspicion and hope. Likely hope that I get stung so they can laugh at me. Well, it was their lucky night.
 I approached the first hive with confidence. I opened the outer telescoping cover to get a good look at the screened inner covers I made last week. Remember those? Well, lets just say this particular one was not bee proof. There inside the attic of my (well I suppose it is "their") hive were five or six bees. As I watched another one came out the single hole where due to variations in the cloth, one hole nearly lined up between the two sheets of hardware cloth. Not to mention, the were out of room in the hive and started building a considerable amount of burr comb on top of the frames and filing it with honey. This is when the trouble starts.
 To add the new deep box, I have to take off the inner cover. If I do that I am going to break a lot of burr comb. I figured the bees loved me and started the operation sans protection and smoke. The bees did not see things my way. As a matter of fact, they were quite upset with me when I popped off the inner cover and broke all that comb then proceeded to try to scrape some off. I got stung here, so the spectators were appreciative.
 At this point I tried just setting the new box on top of it. Nope, it was built up too high. I was going to have to scrape it off. Time to go to the car and get the tools I should have had in the first place. I also got a bowl for the scraped comb.
 Lighting a smoker is one of the arts of beekeeping that eludes me. In my hands it is either a flame thrower or a cold pit of ashes. After several attempts, I finally get a meager stream of smoke to come out. I put on my veil and arm myself with my hive tool. I give the bees a little smoke to get them off the burr comb and commence to scraping.
 Incidentally, smoking bees is a good way to get them out of your way. I am not sure "calm" describes it. I am pretty sure they smell the smoke and then raid the hive eagerly consuming whatever honey they can shove down their gullets. They are not gentle with the combs or caps. I don't really like smoking the bees.
  So I get the comb scraped off, I am happy with the progress the hive is making and put it all back together, escapable screened inner cover and all.
 I did have a nice bowl of what could arguably be called my first honey. Blackberry blossom honey, as a matter of fact. Unfortunately there were bees stuck in it.
 On to the second hive. The hive I am worried about. As I inspect each and every frame, I see no sign of the queen I had hoped would hatch. Every frame that had comb drawn on it was filled with nothing but honey and pollen. No eggs, no drones, no larvae. Now I am worried if I have enough time to add a queen before all the workers die off.
 I have a quick internal debate on whether I should combine the hives or add a queen. As I would hate to try to carry only one hive through the winter, I opted for getting a new queen.
 I closed up the hive and told them to hang on, I will be back tomorrow with a new queen for them.
 I carried the honey covered hive tool, lighter, and bowl of comb back to the waiting crowd. After we picked the bees out we got to enjoy our first taste of honey from the new hive. It was wonderful. I wish I had enough to bottle or an entire frame to make some comb honey from. Next year I will plan ahead and try to get a frame or two of blackberry honey.
Here they are with two deep brood boxes each.
 
 
-Robert

1/4 + 1/4 Is Not Always 1/8

As I live in the south, the heat and humidity come at you pretty fast. It was getting warm and I started worrying about my bees and their ability to regulate hive temperatures. I figured I would install some screened inner covers. How hard could it be to make them? I have a full woodshop and well lots of wood laying around. Should not be a problem, right? Of course not. Nothing is ever as simple as it seems. Sure knocking up a couple of wood frames went without a hitch but try finding some #8 hardware cloth. Number eight is 1/8" squares. Too small for bees to move though but plenty big enough for say air and mites to get through.
 Figuring the deal was pretty much sealed, I headed to the local Wal-Mart on the off chance that they had some. They didn't but no big deal the hardware stores are right down the street. So I hit the two local big box stores in a row. Guess what? Everyone has 1/4" but nothing smaller. So I figure I'll hit Tractor Supply. They HAVE to have it. Well, no, they don't. I am pretty desperate by this point and my wife says "get the 1/4 inch and shift it up and over a half square and like magic you'll have your 1/8" cloth. At this point I had nothing to lose so I ran with it.
 Ok, cutting one piece of this stuff is hard enough but trying to cut the next one exactly on half square over and up is all but impossible. I figured I would cut it a bit small to give me some wiggle room. Finally after wrestling with this stuff for a good 45 minutes I get it all stapled down. Hmmmm sure seems to be a lot of space between the top and bottom piece. I bet there is enough a bee could wander through both pieces. To combat this I use stainless wire to tie the top and bottom sheets together. Looks good! Whew, thought I would never finish that. I sure hope I can fine some #8 before I start making bottom boards.
 The moral of this story (which continues in the next blog) is that two sheets of quarter inch hardware cloth do not make eighth inch hardware cloth. Remember this well and you will be a happier bee keeper.

Installing the Nucleus Hives

After getting the bees to their new home, it was time to move them into their permanent hives. They were in a couple of 5 frame nucleus (nucs) hives. I needed them in their new 10 frame langstroth hives. Apparently this has to be done in a certain way or the bees can get confused. They learn where their home is and if it is moved very much, they get lost. I definitely did not want to mess up my bees. They were kind of pricey. Besides, I felt like I just adopted 60,000 kids.
 So here is how it went down. I placed the nucs directly in front of their current positions allowing me to place the new hives as close as possible to where I just moved the nucs from. I then opened a nuc and a new hive. I removed six center frames from the new hive and one by one moved the frames from the nuc into the new hive being careful to keep them in the same order they were in the nucs.
 The first hive went very well. I saw the queen and was careful not to squish (roll) her between the moving frames. I initially pulled out 6 frames from the new hive so I would have room to slide everything in place. After installing the bees into the new hive, I slid the frames toward each other and slipped the extra one I pulled out in the empty space on the edge of the hive. Just being careful not to hurt anyone.
 The second hive was going great. I was moving the frames looking for brood and honey when I spotted the queen. She then fell off the frame and kind of flew around. I am pretty sure that was when I lost her. I am still trying to get that hive back up to speed.
 None the less, after all was said and done both hives were ready to go and full of bees. Fortunately they have stayed in their new homes and have started building comb.
 I have since built two nuc hives for collecting swarms. If only someone would call me to go collect a swarm.
 One more note, as far as equipment goes, I have a smoker, a hive tool (a must have), and a bee veil. I have since done bee work without the veil but I like to wear it most of the time. I only use the smoker if the bees seem agitated.
Happy Hives
Apparently you are not supposed to paint your entrance reducer. Oops.
 

Why Beekeeping?

Hello everyone. Bees have always fascinated me. Especially honey bees. I remember in Florida as a child, my great grand parents had two hives on the farm. I would love to watch them coming and going. Those hives were never managed in my time but they thrived. I am sure by now they have either died out from all the introduced mites and diseases or, hopefully, someone has taken them over. Around the same time, a neighbor (we knew him only as Mr. Morgan) had bees as well and oddly a HAM radio. Hobbies make life interesting I suppose. My brother and I would visit him frequently to talk about the bees.
 Recently my Dad started keeping bees. I have some of his honey in the cabinet. Last time I visited we sat and talked about his bees and I watched them for a while as well. I love the smell and sound of an active hive.
 I finally decided to take the plunge and get some bees of my very own. So about a month ago I headed to the local apiary and purchased two 10 frame Langstroth type hives. Well, then I needed some bees and some beekeeping education.
 Assembling the boxes was pretty simple. In a few hours, my 10 year old son was turning out deep hive bodies for me with nice finger joints on the table saw. I was making sure we were ready to expand when the time came.
 Bees seem like a pretty simple thing to get hold of. Apparently if you wait until April, bees are getting pretty scarce. Ideally I would have liked to catch a few swarms for starting my new hives but there were none out yet, possibly due to the weather we have been having.
 Education? Hello internet. The internet has a vast array of beekeeping information much of it conflicting. Well I read quite a bit in a few places and tried to make informed choices. Possibly the best thing I did was join my local beekeeping club. There are a lot of nice people there who are ready to share what they know. Not to mention, a lead to get some bees.
 After speaking with a few gentlemen at the bee club meeting one of them mentions that he knows of a guy who has bees for sale. In the background his wife is telling me I can have all the bees I want anytime he is not home. I took that as a joke and moved along.
 Finally!! I am going to get some bees. After speaking with the bee seller he arranged that I come pick up my bees after sunset to ensure everyone is home before hauling their house off. Unfortunately, my city does not allow you to keep bees inside city limits. Fortunately, I have some friends north of town who are not bound by such foolishness.
 On the big night, I show up to pick up two cute little nucleus hives, which are plywood five frame hives with screens on all the entrances to keep the bees in. I then drive them all the way up to my friends house and drop them off on a hastily assembled hive stand.
 I excitedly open their little screen doors and head home for the night.